Looking for the best cache plugins to make your website load faster? If yes, then here I’m with another exclusive review of WP Rocket and in this post, I’m sharing my personal review of WP Rocket after using it for several years on my website. I’ll also share how to make your website loads 47% faster than any other websites out there and achieve a 99% score in GTMetrix and PageSpeed insight.
WP Rocket is the most powerful page cache plugin you ever got with WordPress and with the latest update of WP Rocket 3.0, there is a drastic change in the performance as compared with several cache plugins out there. It comes bundled with essential features which make your website load faster. Some of these can include, CSS & JS CDN integration, image CDN integration, media optimization, preloading, and prefetching.
Without wasting any more time, here I’m sharing the review of the best cache plugin out there and we’ll also share how effective and worthy it is. So, let’s find this out in our deep review along with its comparison with various of the best caching plugins out there.
Table of Contents
About WP Rocket
WP Rocket is an advanced WordPress cache plugin in the market with tons of benefits optimized for the fastest website speed. It comes with lots of cache and website settings, that will make your website load instantly and helps in reducing the size of the page and increasing the page speed in Google PageSpeed Insight and GTMetrix.

Unlike other WordPress cache plugins which come with one of the trickiest settings, if we talk about WP Rocket, it is simple and easy to use. Even a person with no technical skills or knowledge can optimize the website without any issues using this plugin with a lot more functionalities.
Here is some other WP Rocket features that you should know:
- Full Page Cache
- GZIP Compression
- Preloading and Prefetching
- Database Optimization
- Advance Cache Rules
WP Rocket License Type
For users, WP Rocket offers three different types of licenses through which a user can optimize their website. These licenses are for a single website, multiple websites, and a plan which is best suited for agencies.

All these plans come with one-year support and updates from WP Rocket. Here I’m briefly explaining each and every plan of WP Rocket.
Singe License
This is one of the most recommended and used plans of WP Rocket. This plan is suitable for people who want to optimize a single website with WP Rocket.
If talking about myself, I personally prefer using this plan for my website which you’re reading now and it works like a charm for me.
Plus License
It is another most popular plan which is offered by WP Rocket to its users. With this plan, you can use the WP Rocket plugin on up to 3 websites along with 1-year updates and support.
So, if you wanted to optimize more than one website and less than three websites then this plan is for you!
Infinite License
This is the last plan which is offered by WP Rocket. This plan is ideal for agencies and people who have more than 3 websites to optimize.
As with other plans, this plan also comes with one-year support and updates, so if you’ve got any issue using this plugin, you can simply contact their support team and they’ll fix it for you.
How to Purchase WP Rocket?
Not sure how to purchase a WP Rocket license from their website?
Here I’m sharing a step-by-step guide through which you can purchase a WP Rocket subscription without any issues and skyrocket the speed of your website in no time.
The first thing you’ve to do is, click here to redirect to the WP Rocket homepage. Once you’re on the WP Rocket website, you’ve to click on the “Get WP Rocket Now” button showing in orange color.

When you click on “Get WP Rocket Now,” it will redirect you to the pricing page, where it shows you three plans. Based on your requirements, select the plan you want to buy for your website.
In my case, I’m selecting the Plus plan, which comes with a license to use WP Rocket on 3 websites and provides one-year support for the same. So once you click on the “Buy WP Rocket” button showing after the plan name, it will redirect you to the confirm order page.
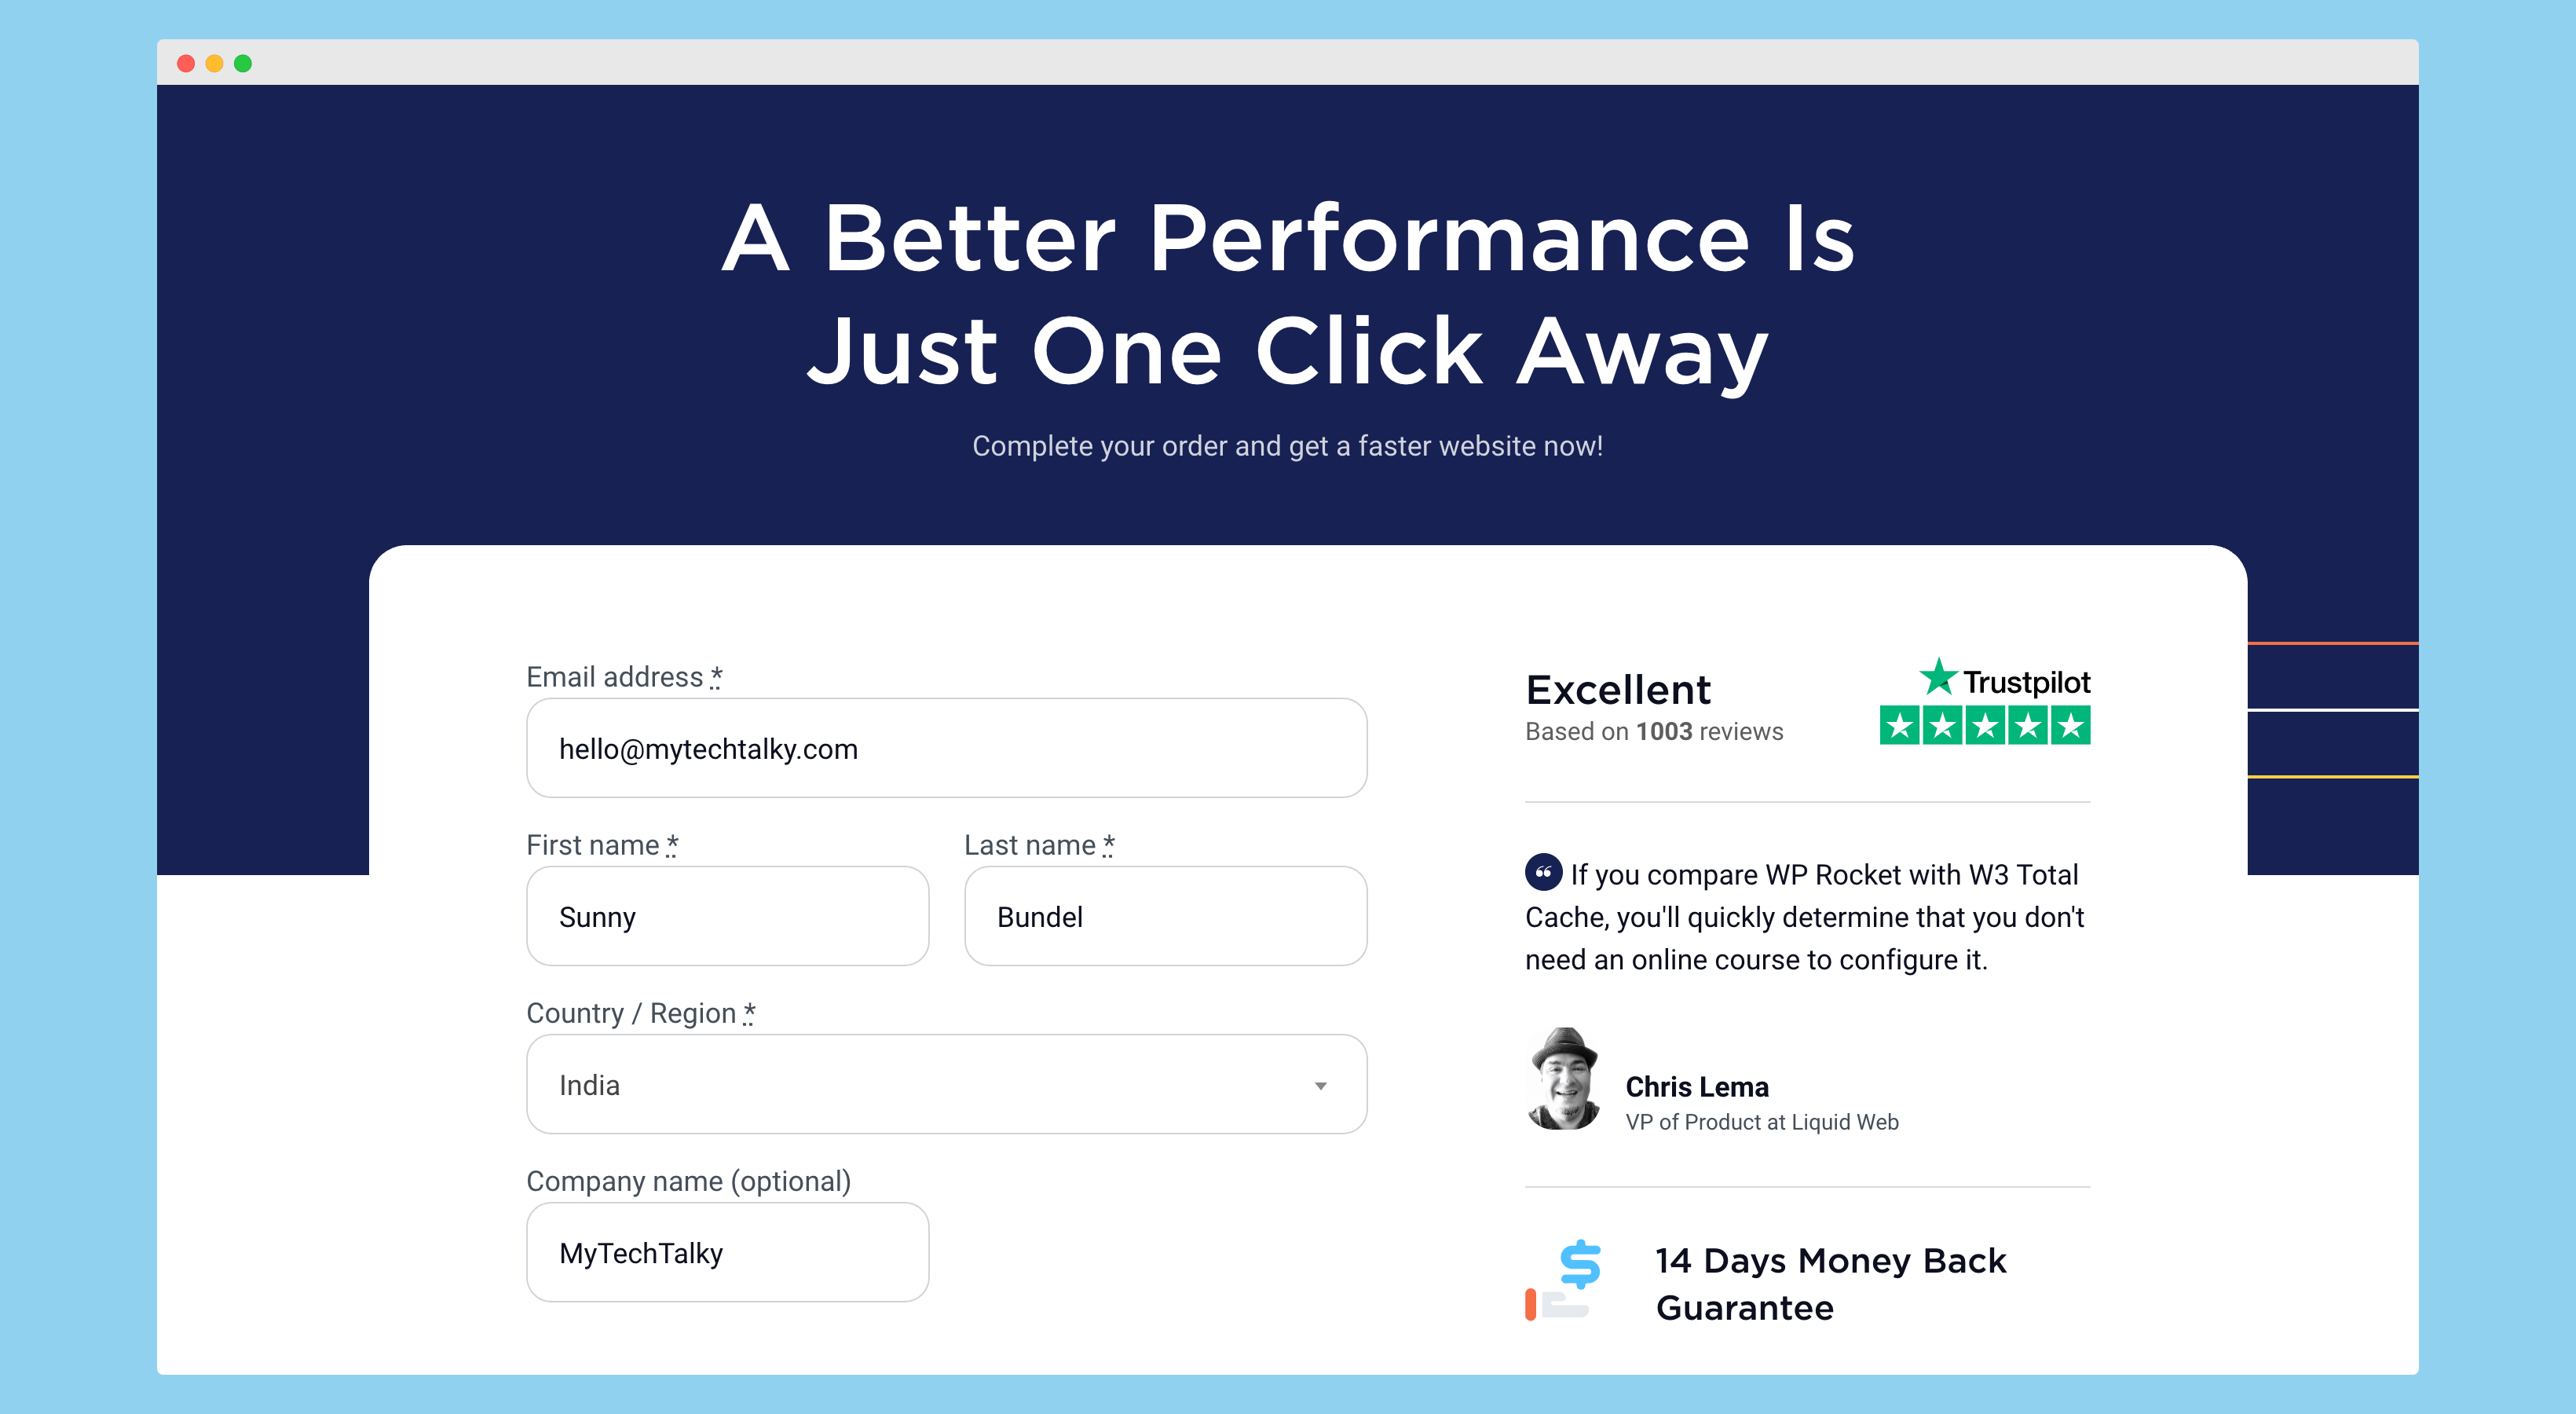
On the order confirmation page, it will ask a few basic questions including your name, email, and the password you wanted to set for your WP Rocket account.
Along with it, it will show you the option to make a payment using credit card or debit card details. You’ll also get the option to select PayPal as a payment method – which in my scenario, is one of the best methods to pay someone through.
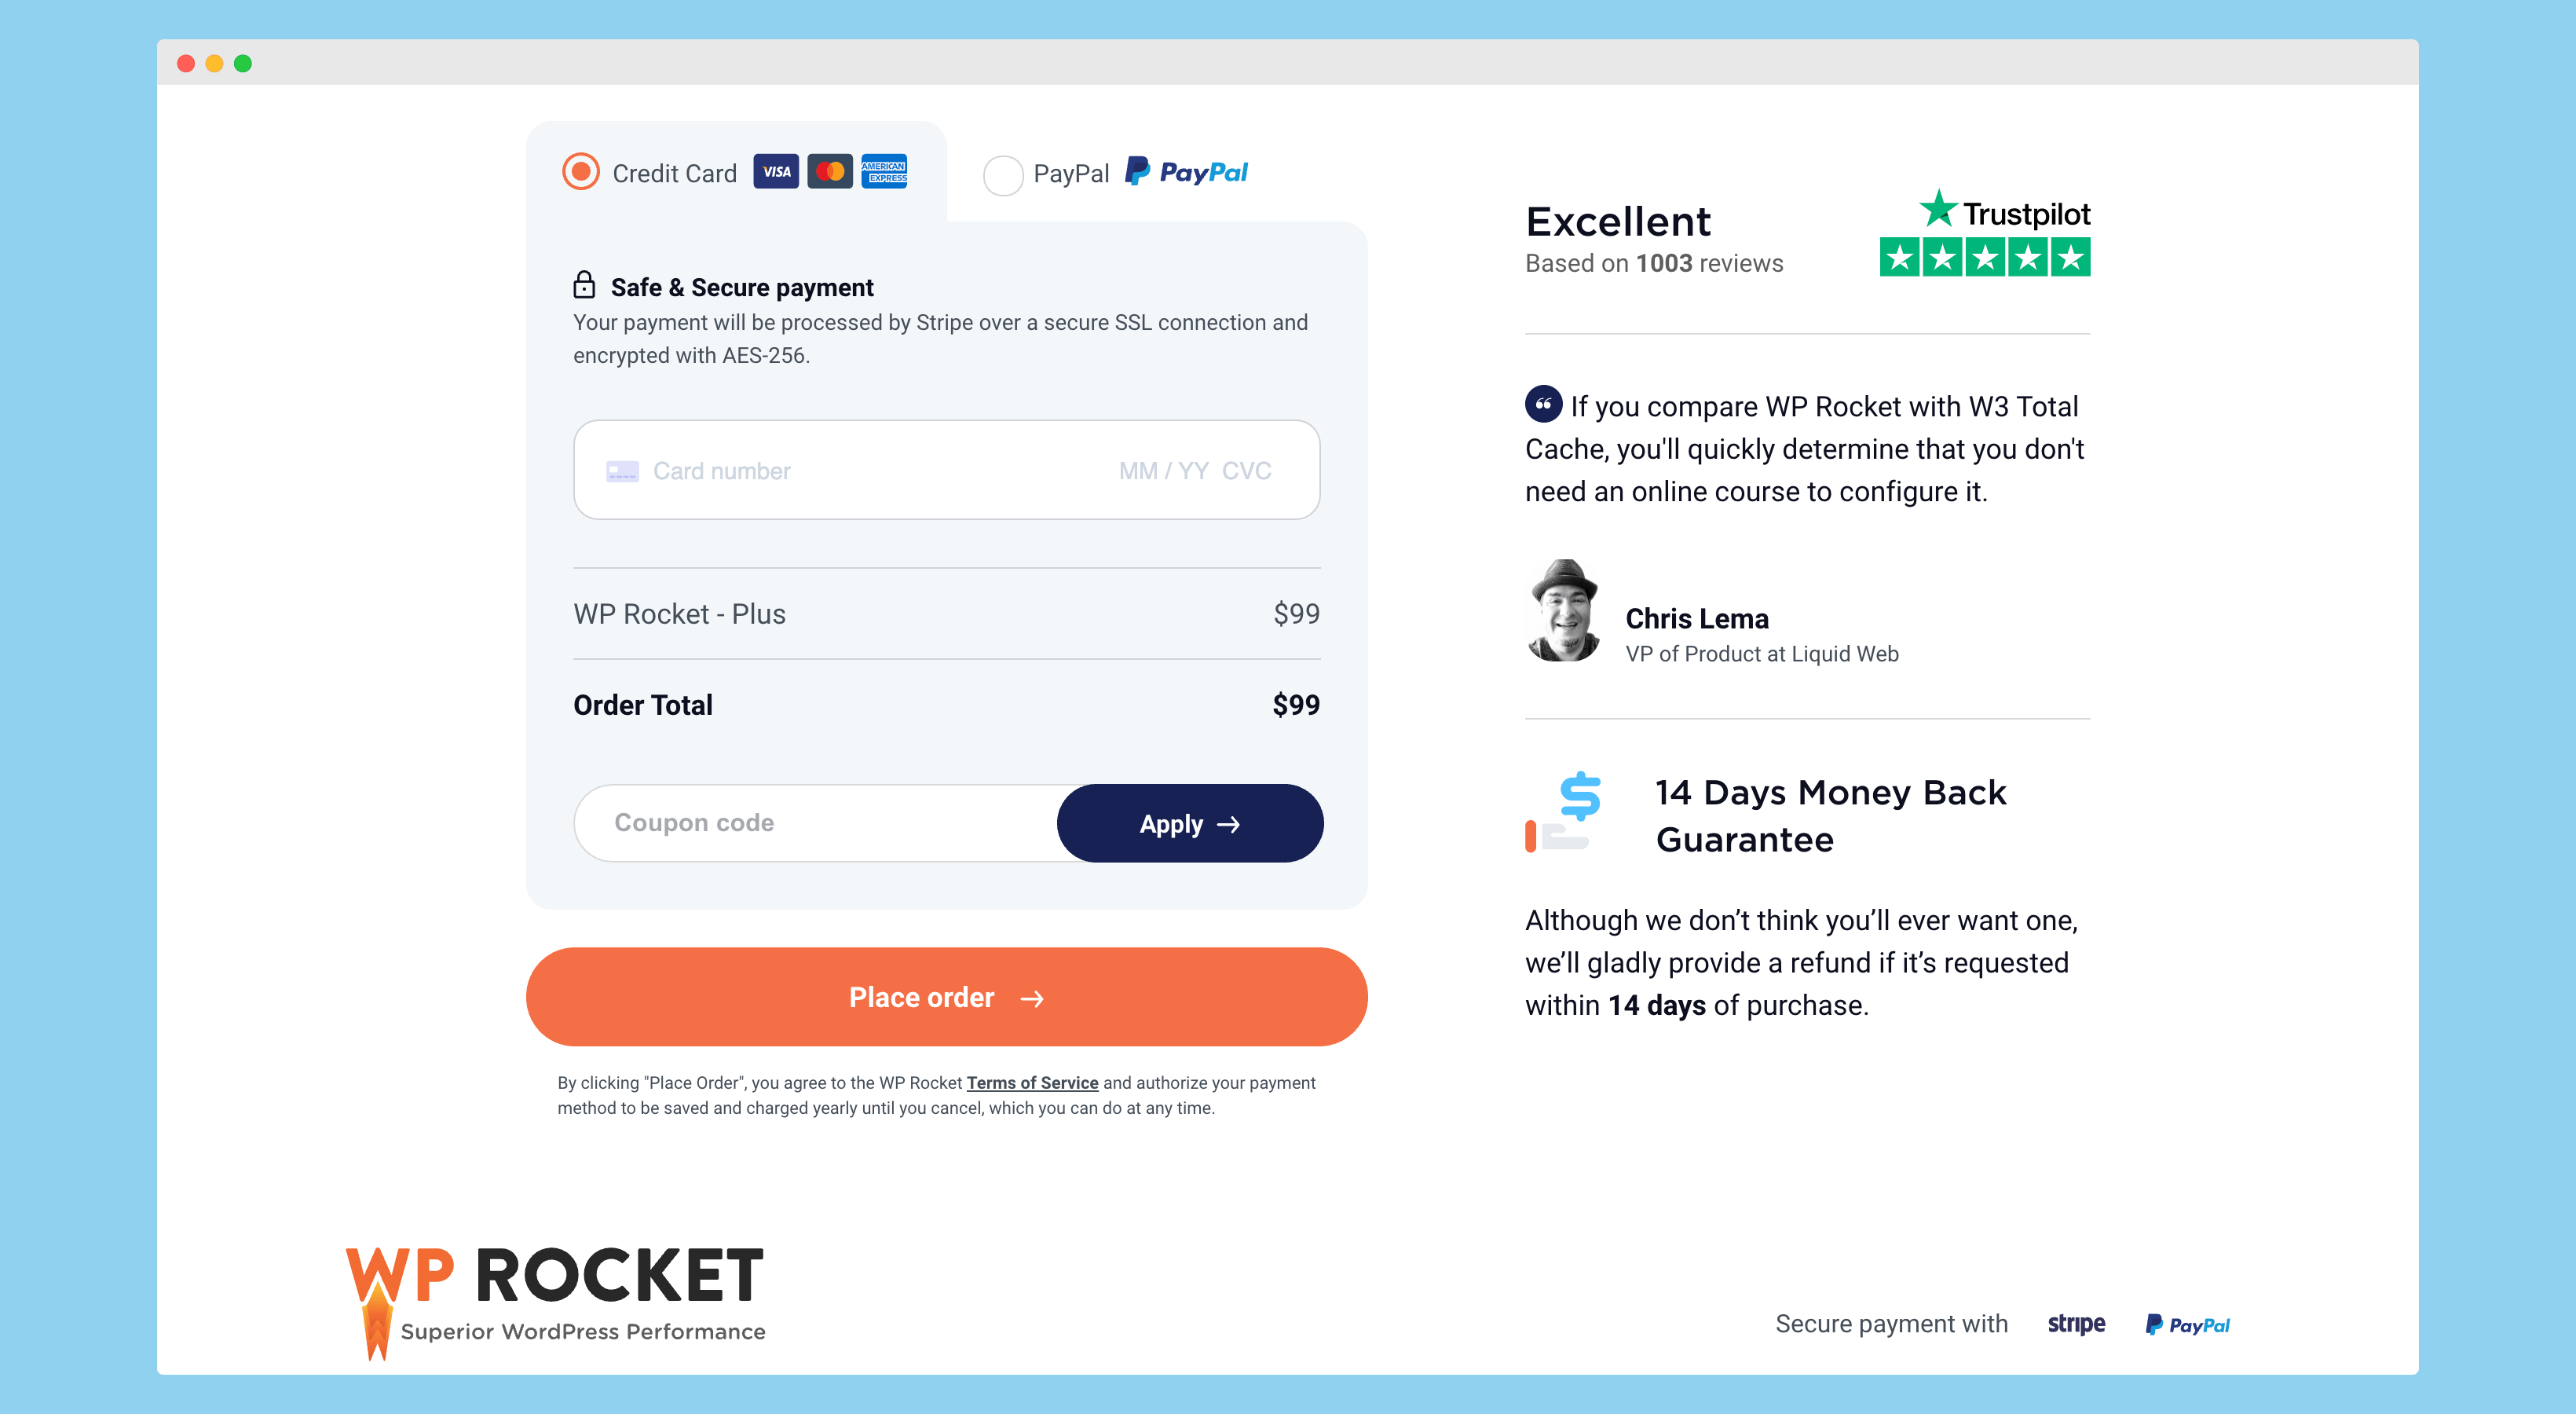
Once you’ve done adding everything, you’ve to click on the “Place Order” button, and done!
How to Install WP Rocket
Not sure how to install this plugin on your website?
Here I’m sharing a step-by-step guide in which I’ll share the steps to install this plugin on your website. You can do the same steps on your website to successfully install and activate this plugin.
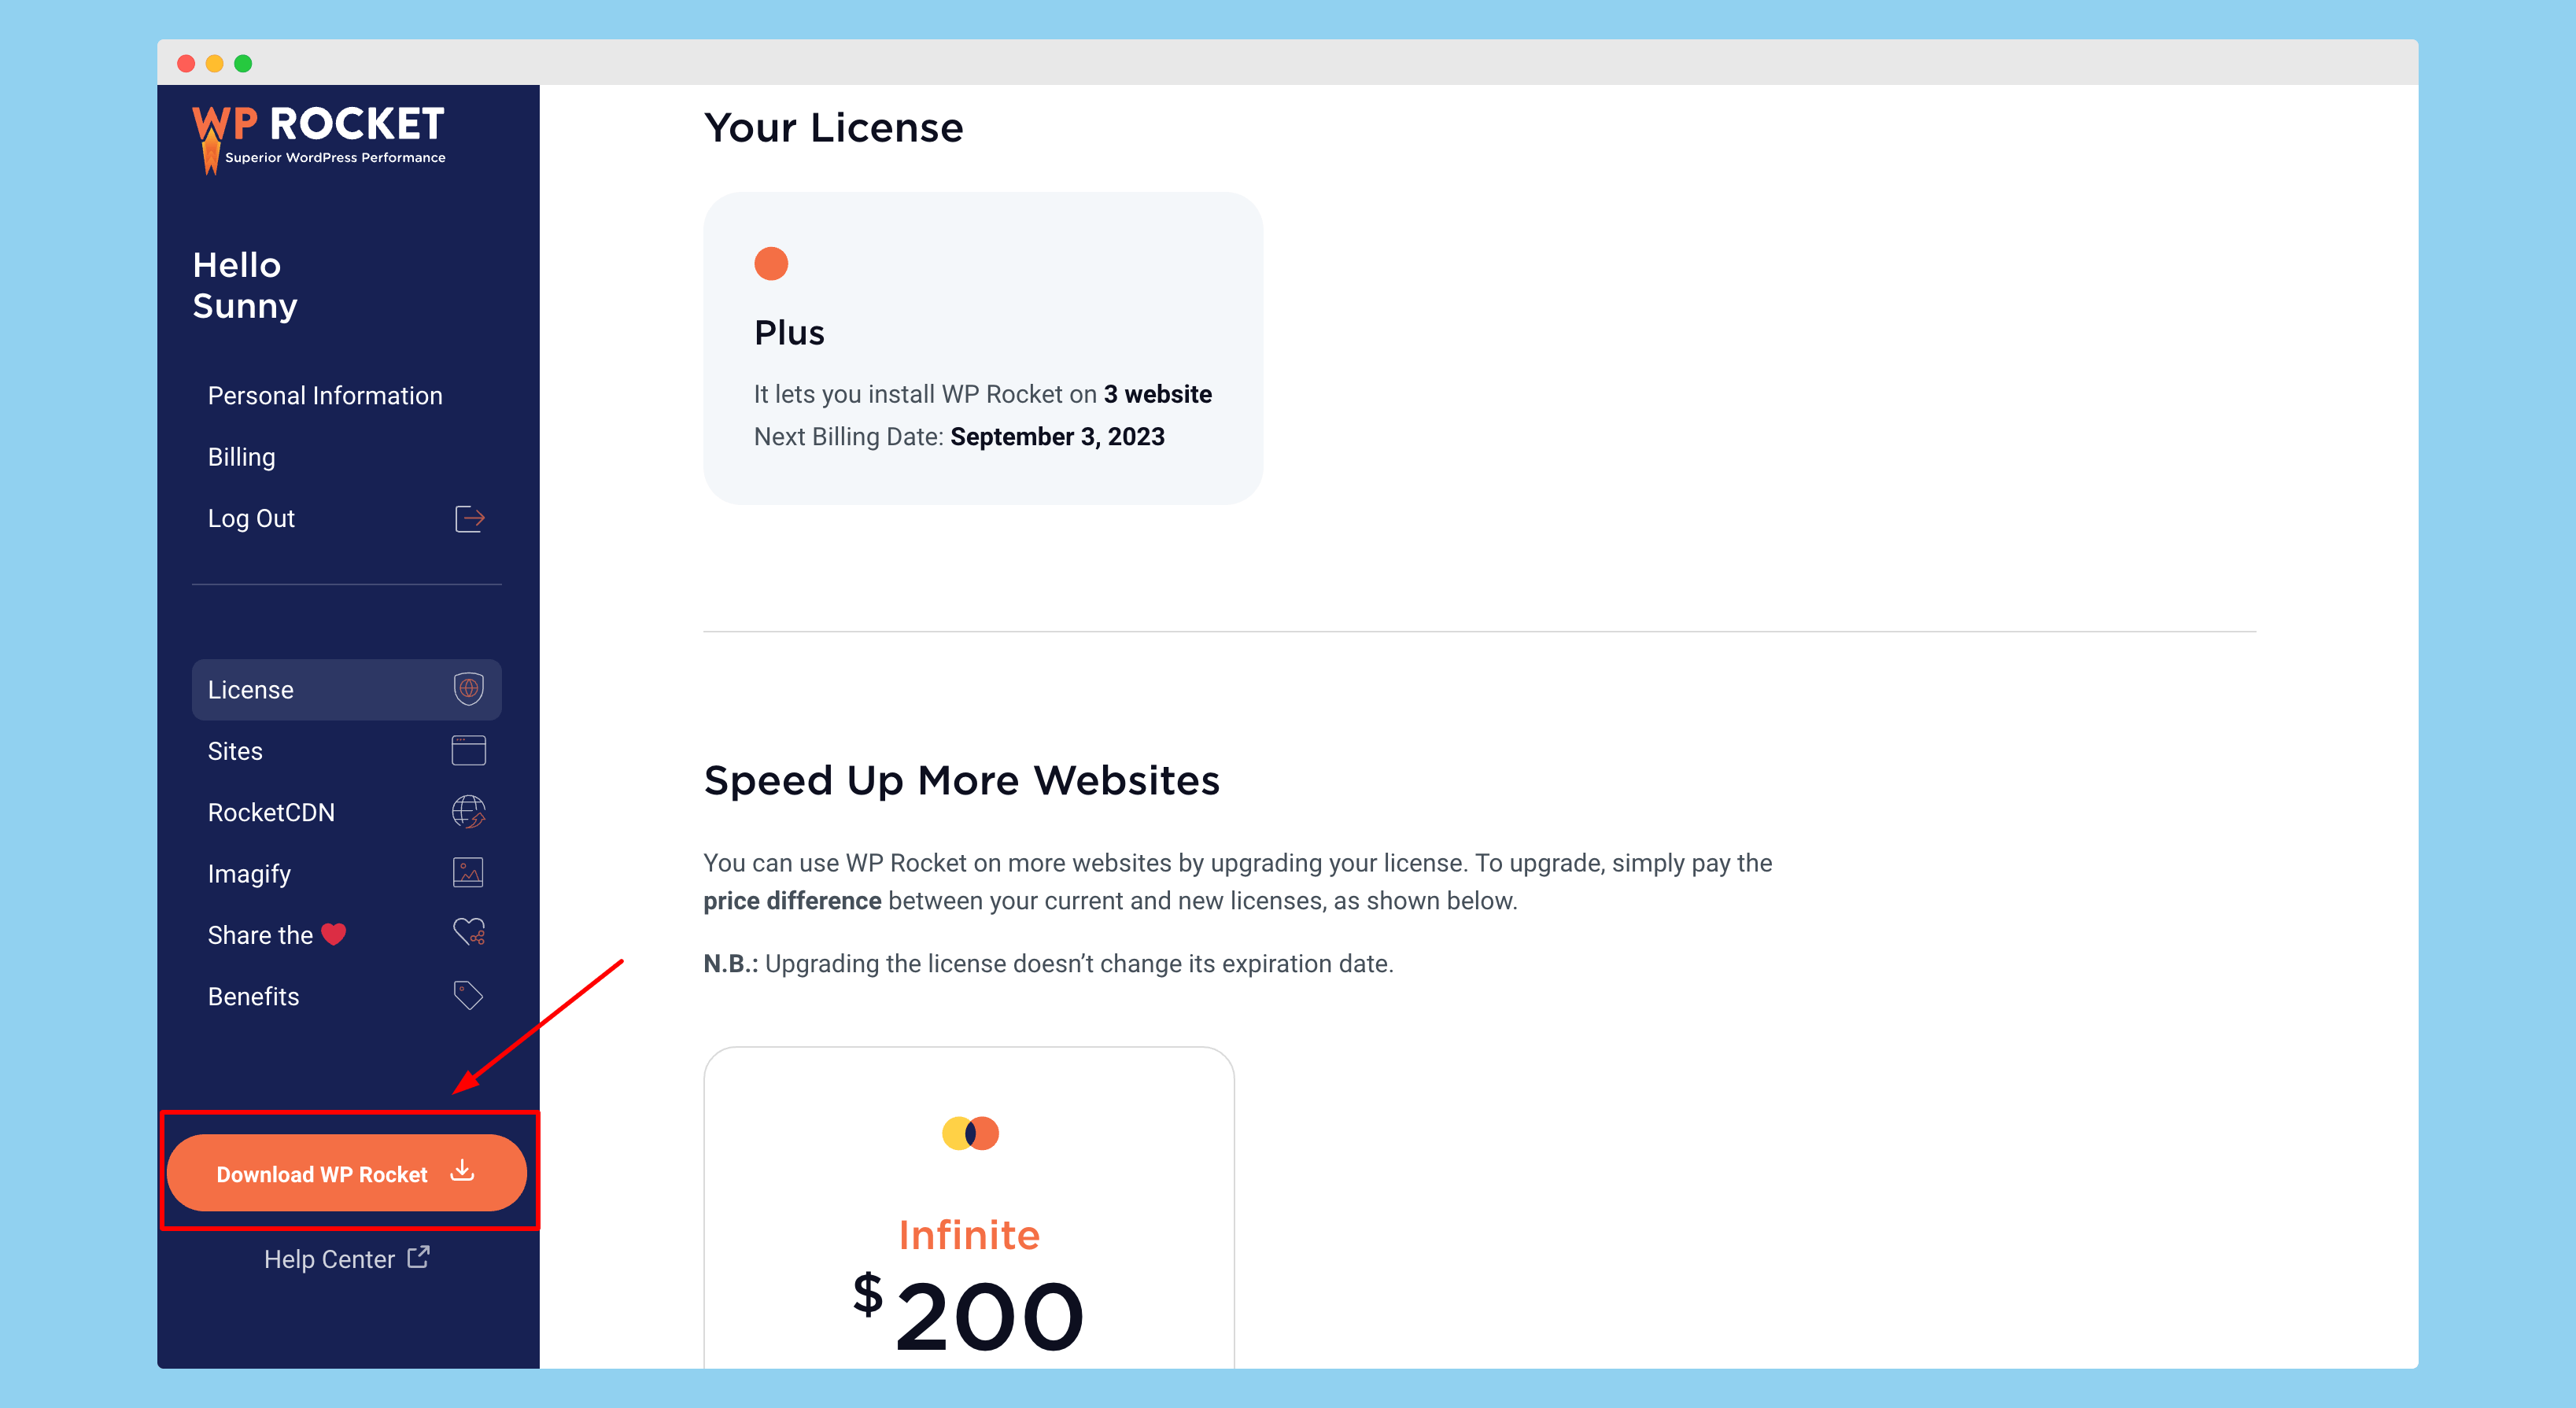
First of all, click here to go to the WP Rocket website and then log in to your account. Once you’re logged in to your account, click on the “Get WP Rocket” button showing on the below-left side. It will start downloading your plugin.
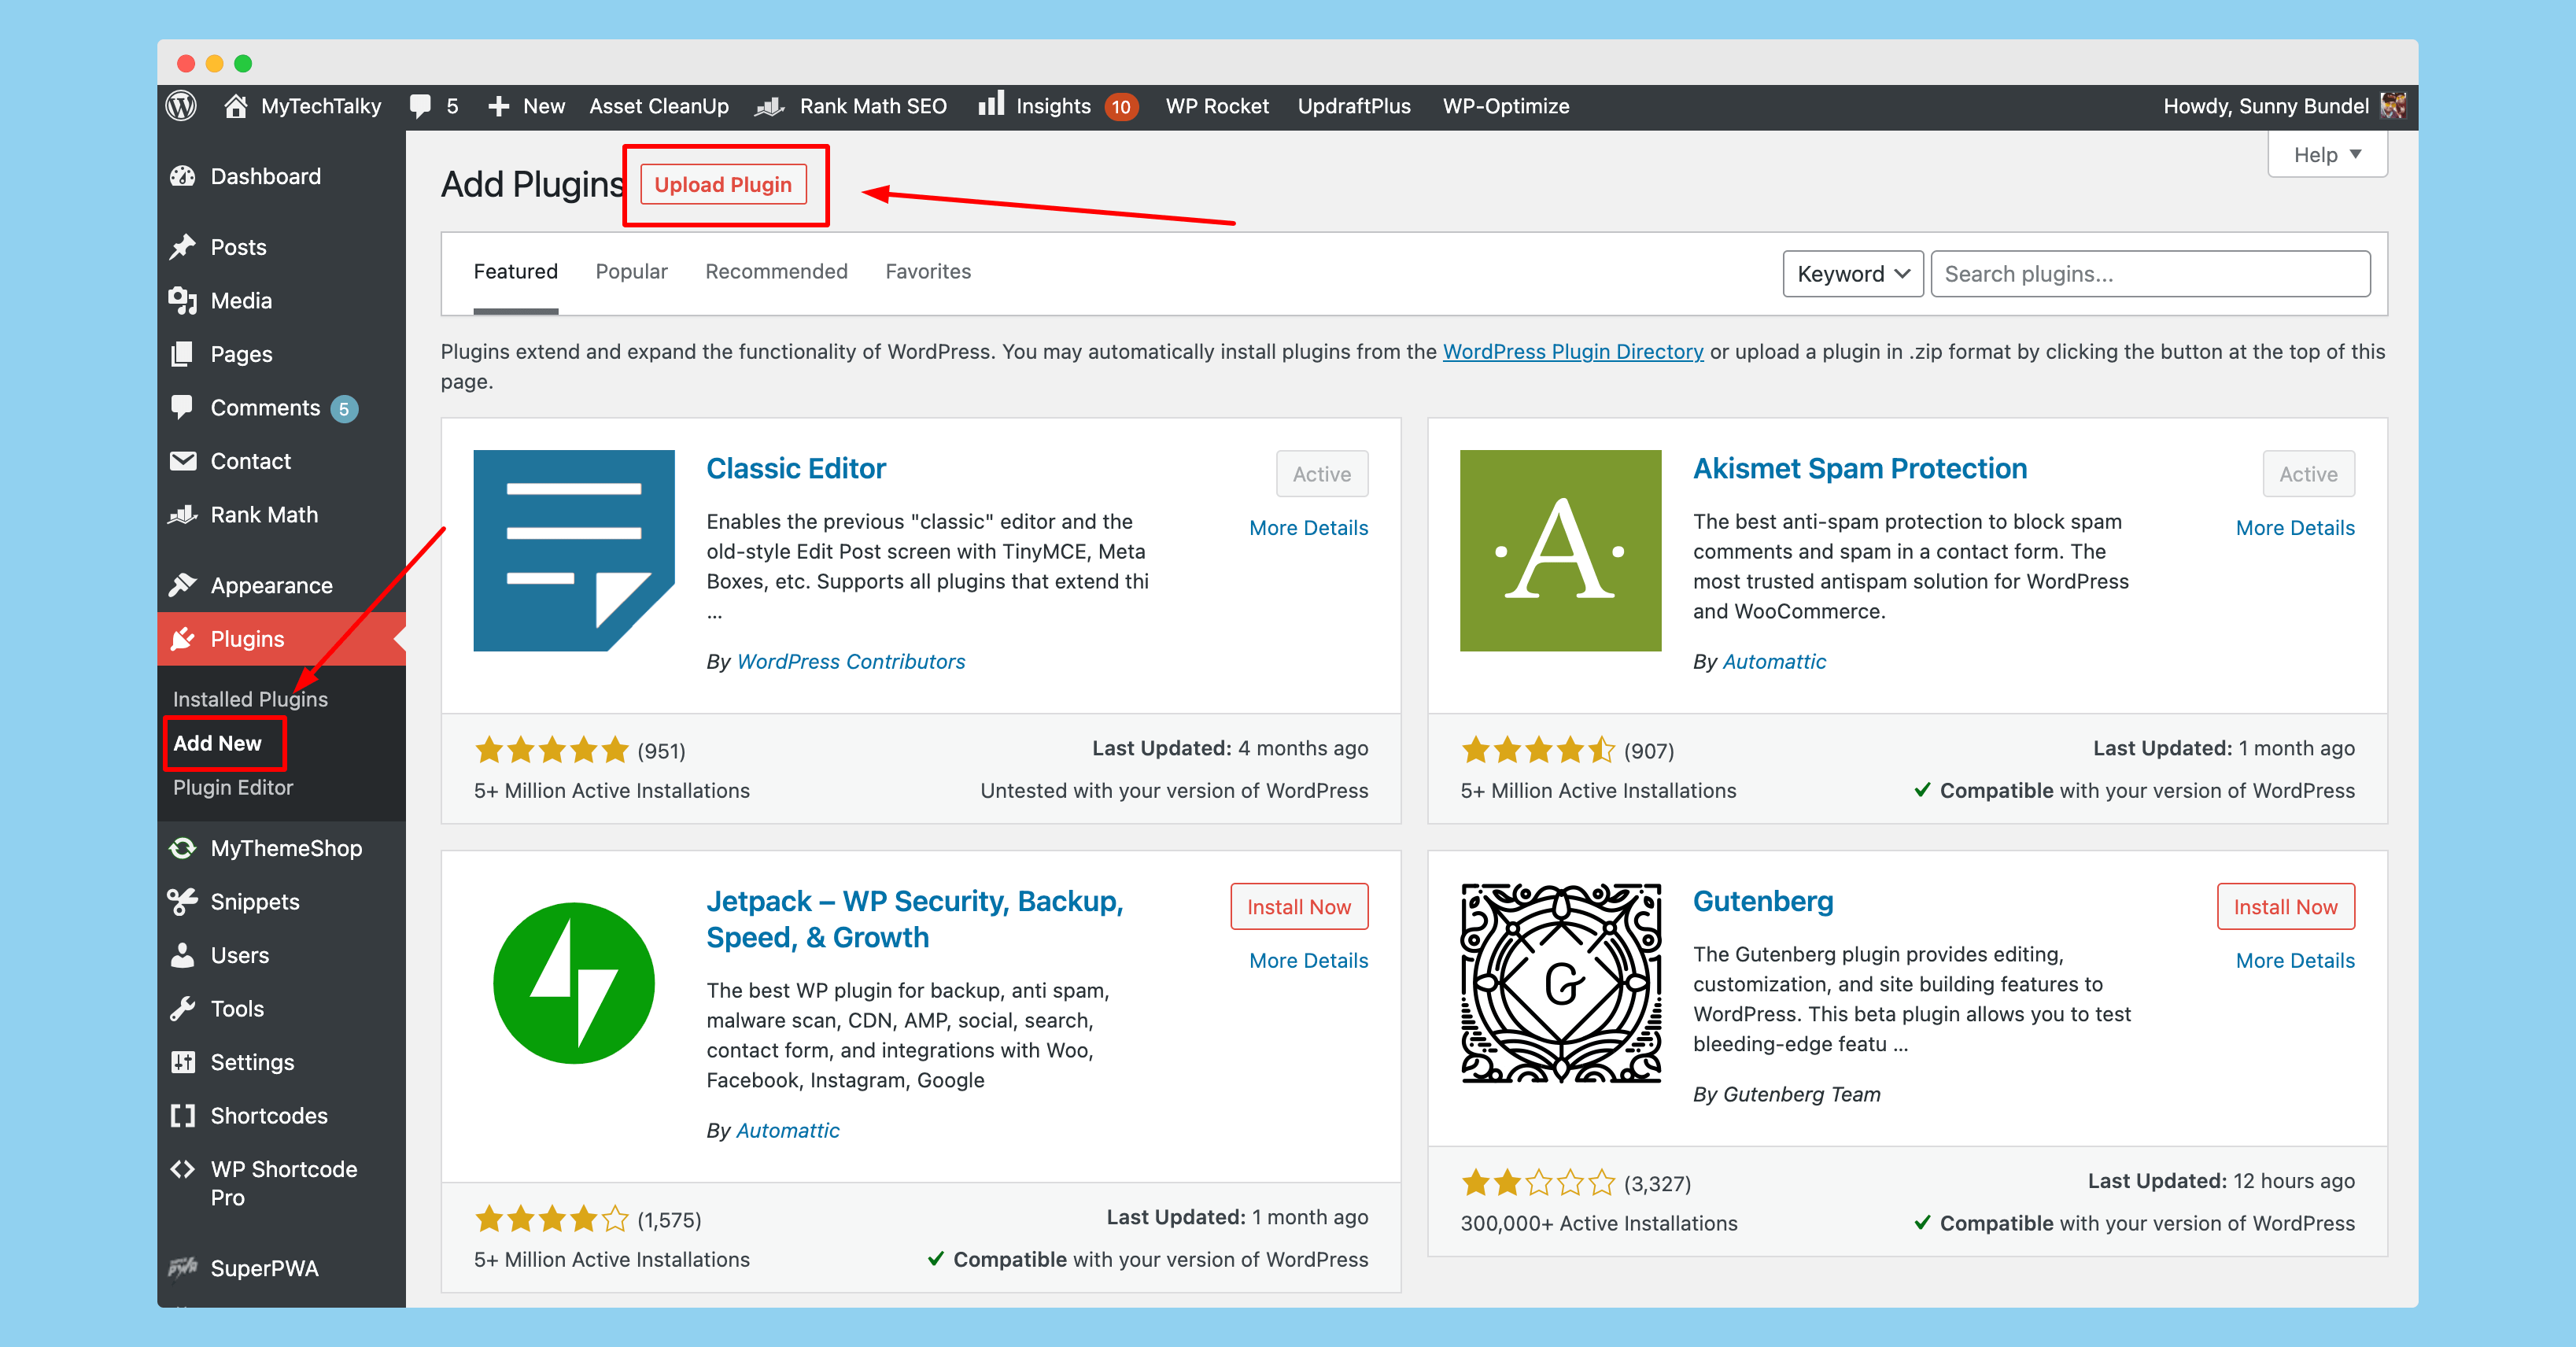
Once your plugin is downloaded, open the WP-Admin panel and then click on “Plugins > Add New“. It will open a page where it shows the option to upload the third-party plugin to your website.

Now select the plugin and click on the “Upload” button, once the plugin is installed click on the “Activate” button showing in the blue color button.
It will further check the license and upload the plugin to your website. Now you’re ready to make changes and optimize your website using WP Rocket.
Features of WP Rocket
Here are a few breathtaking features of WP Rocket that make it one of the best cache plugins out there.
Page Cache
Website and a page cache are one of the most important features in cache plugins. WP Rocket is handy and comes with a powerful cache option that facilitates caching the full website and pages for the fastest website loading.
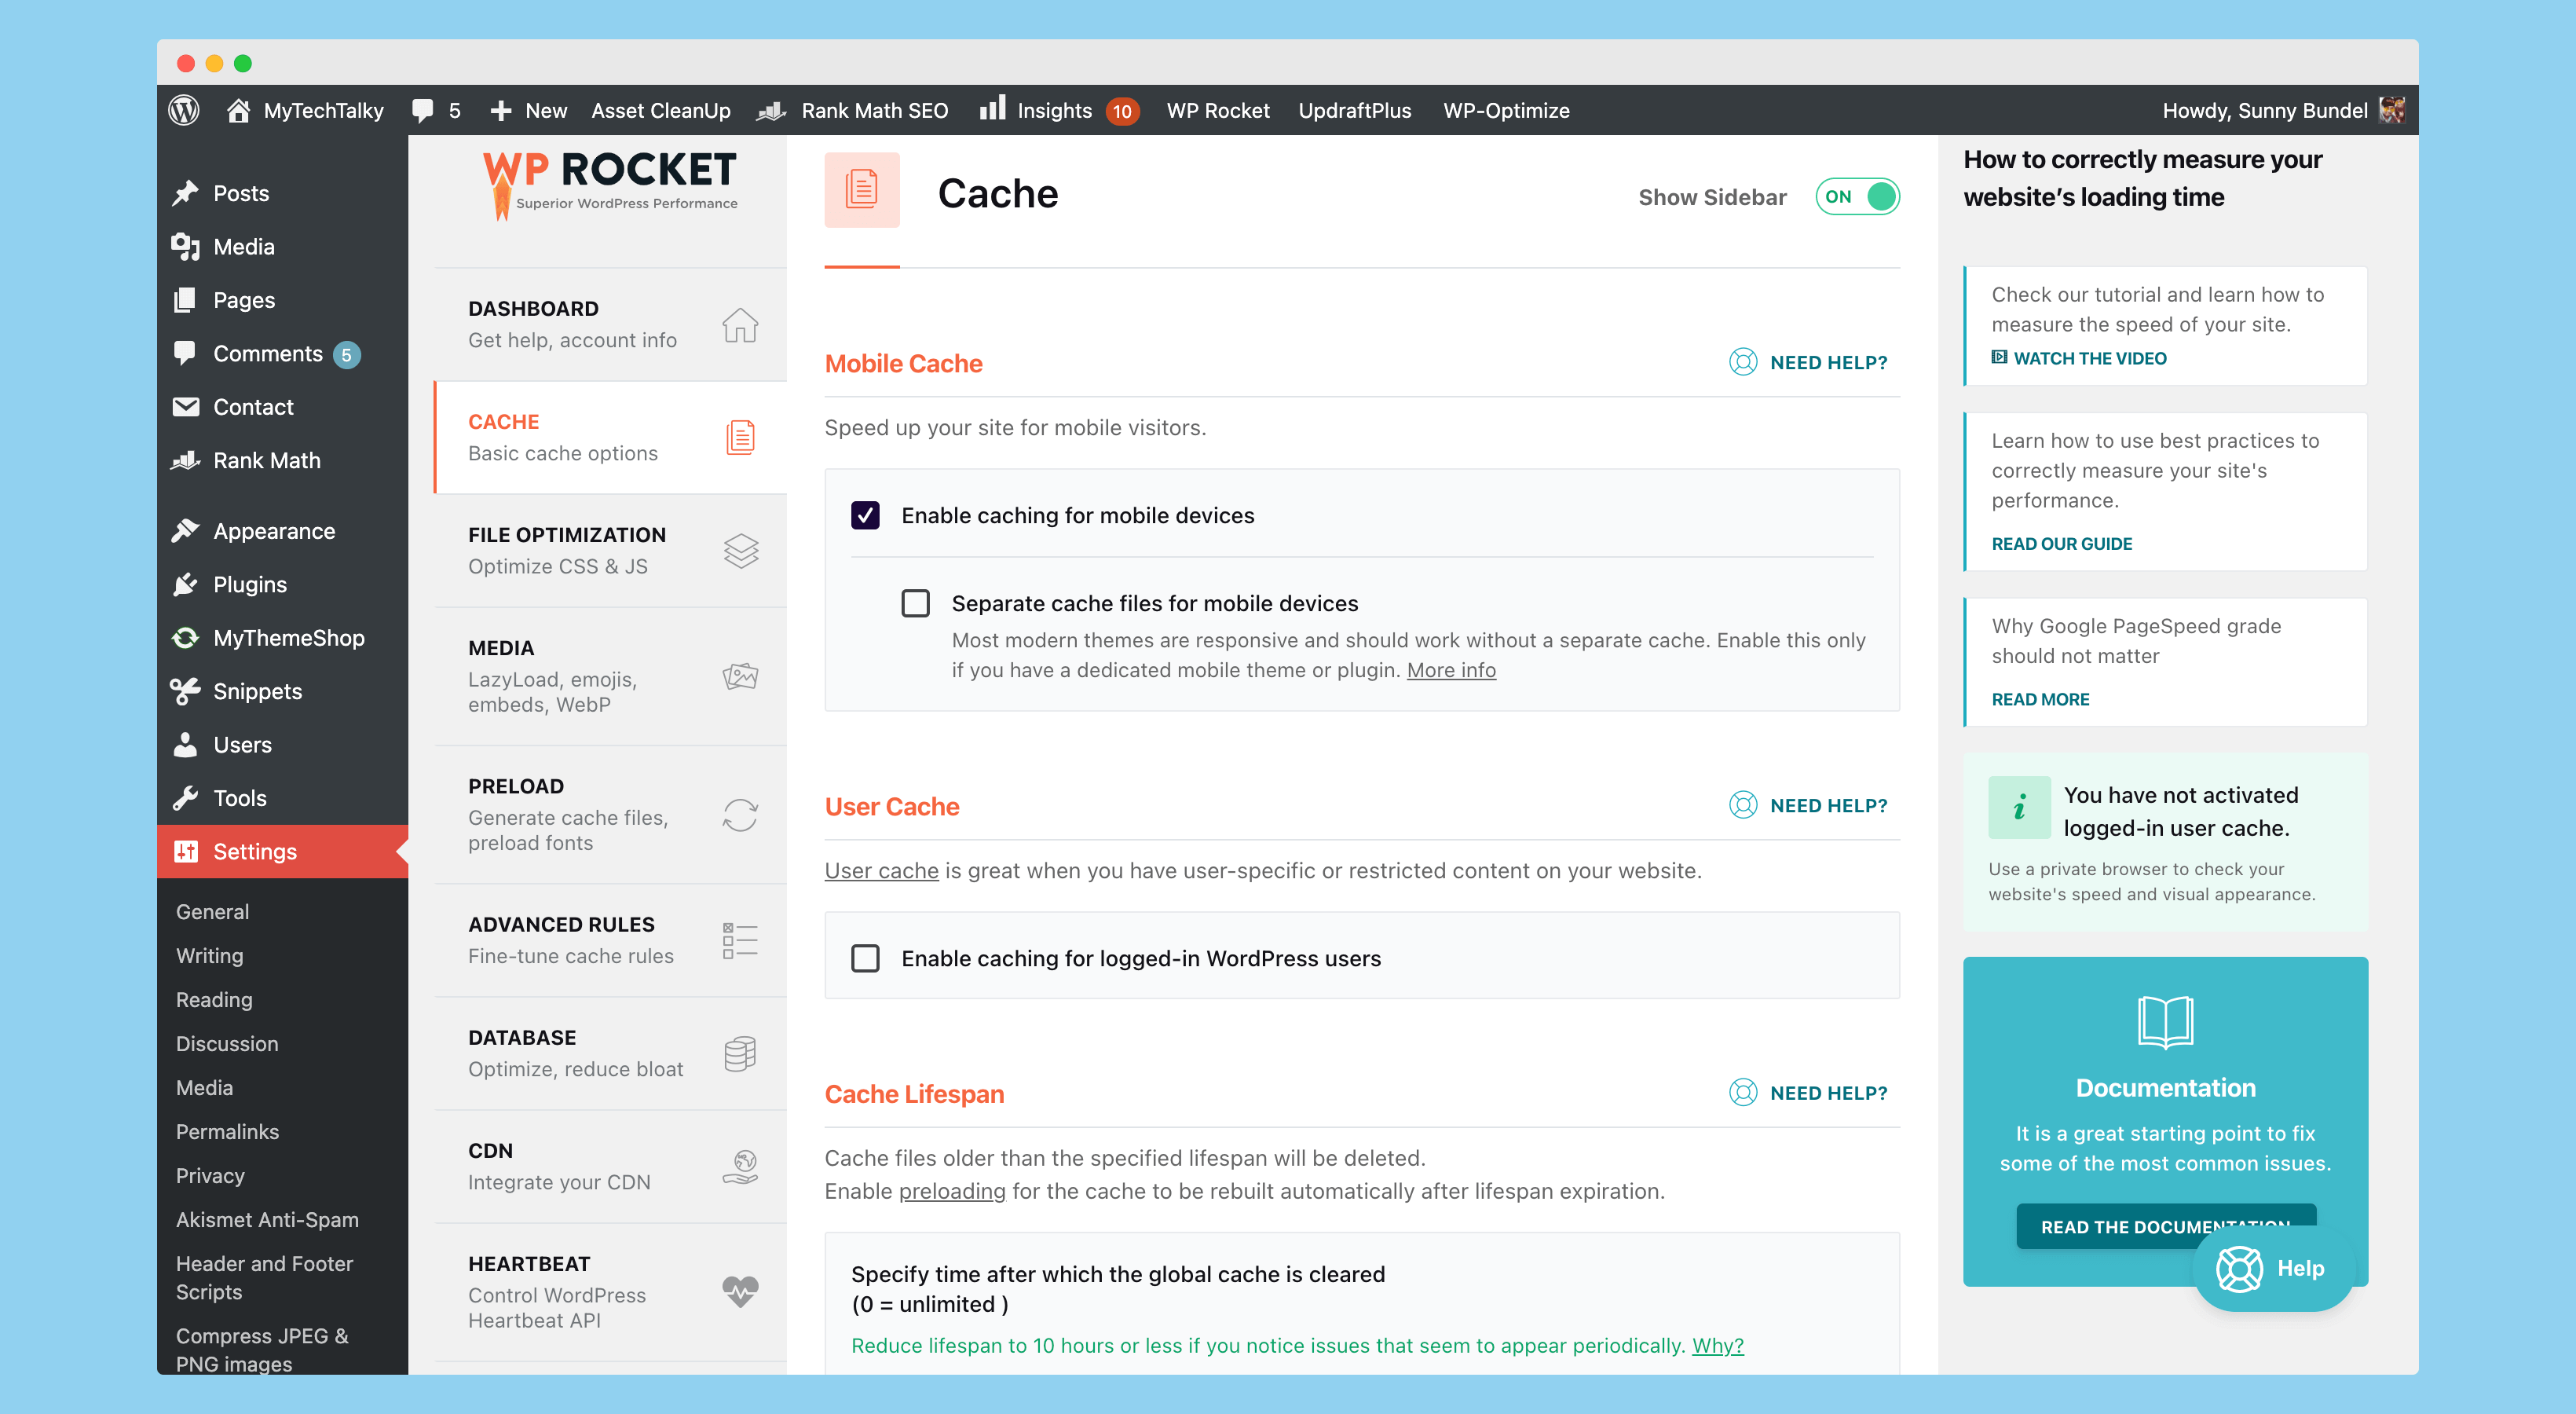
It is one of the most important things which makes a website blazingly fast and helps to increase the conversion & leads of your website.
File Optimization
File Optimization is another important thing which is integrated with WP Rocket. It provides an option to optimize files and remove unwanted things from them (minification).
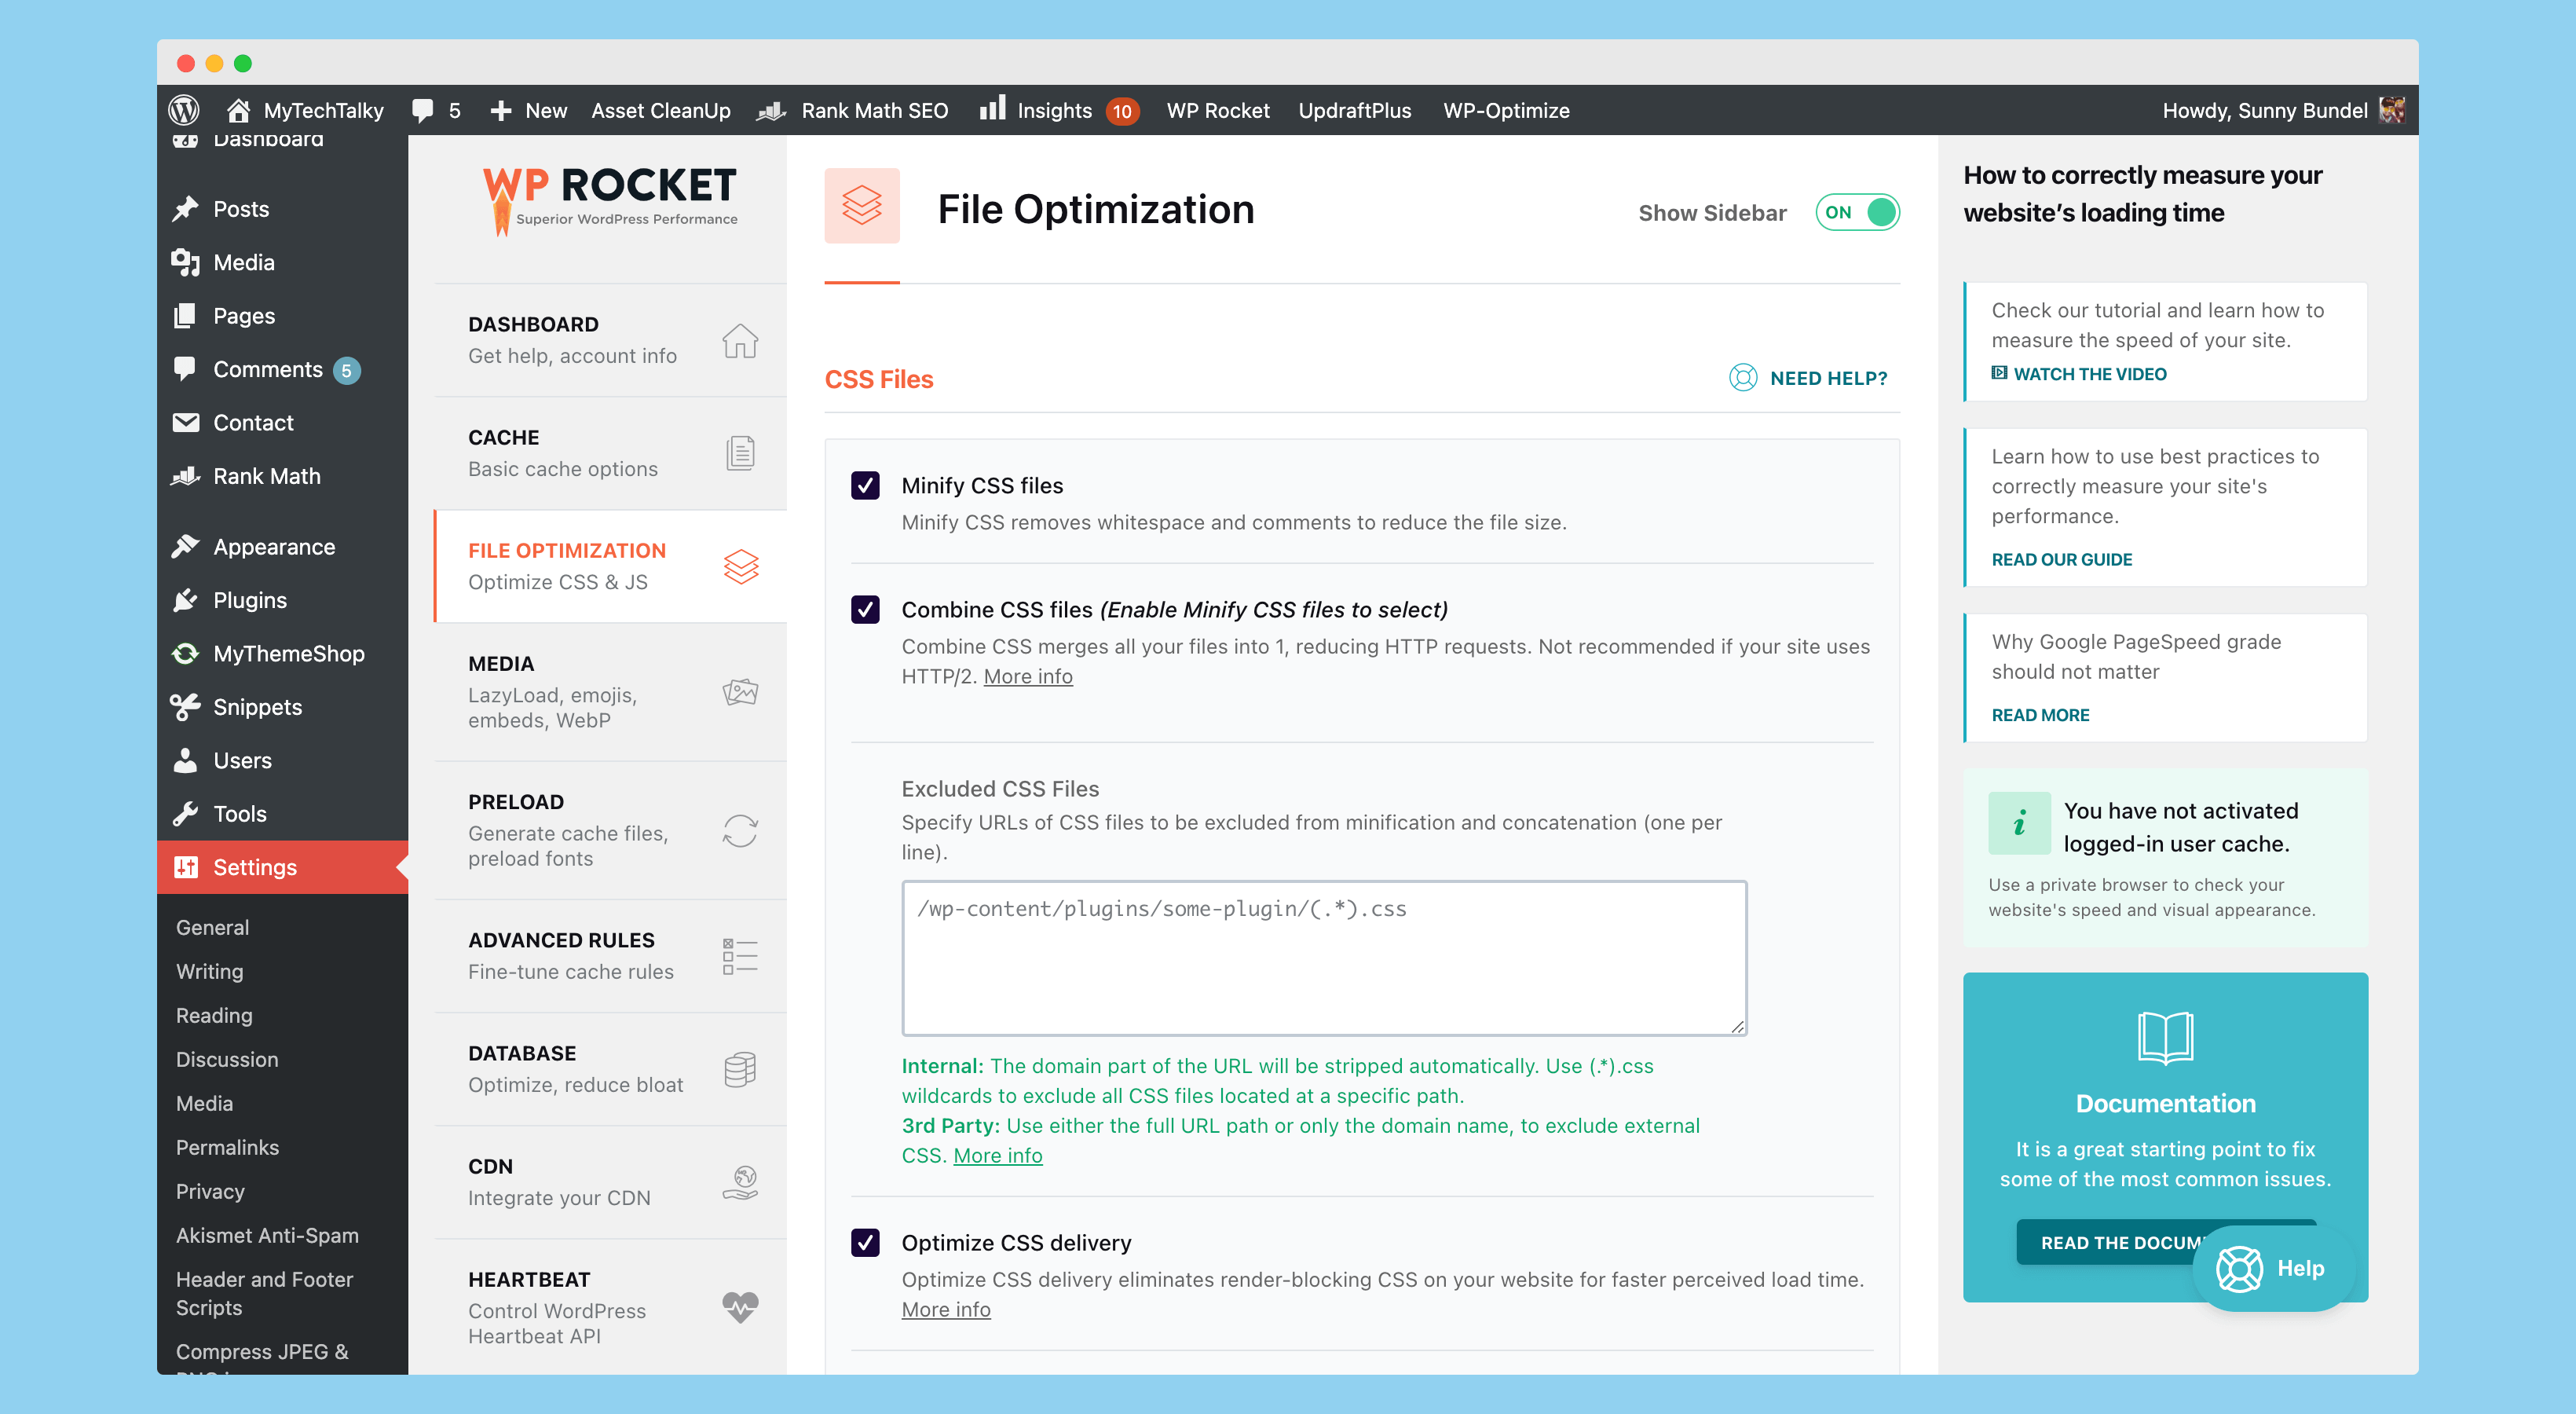
With the help of File Optimization, you can easily optimize the HTML, CSS, and JS of your website and remove unnecessary stuff from it. Additionally, you can combine multiple CSS and JS files into a single file of CSS and JS which makes loading blazingly fast and also reduce the lookup time.
CDN & Media Optimization
Media and CDN Optimization is another most important thing which is usually missed in other cache plugins. With WP Rocket, you get an option to lazyload your images, iframe sources, and even optimize the embedding of youtube videos on your website.
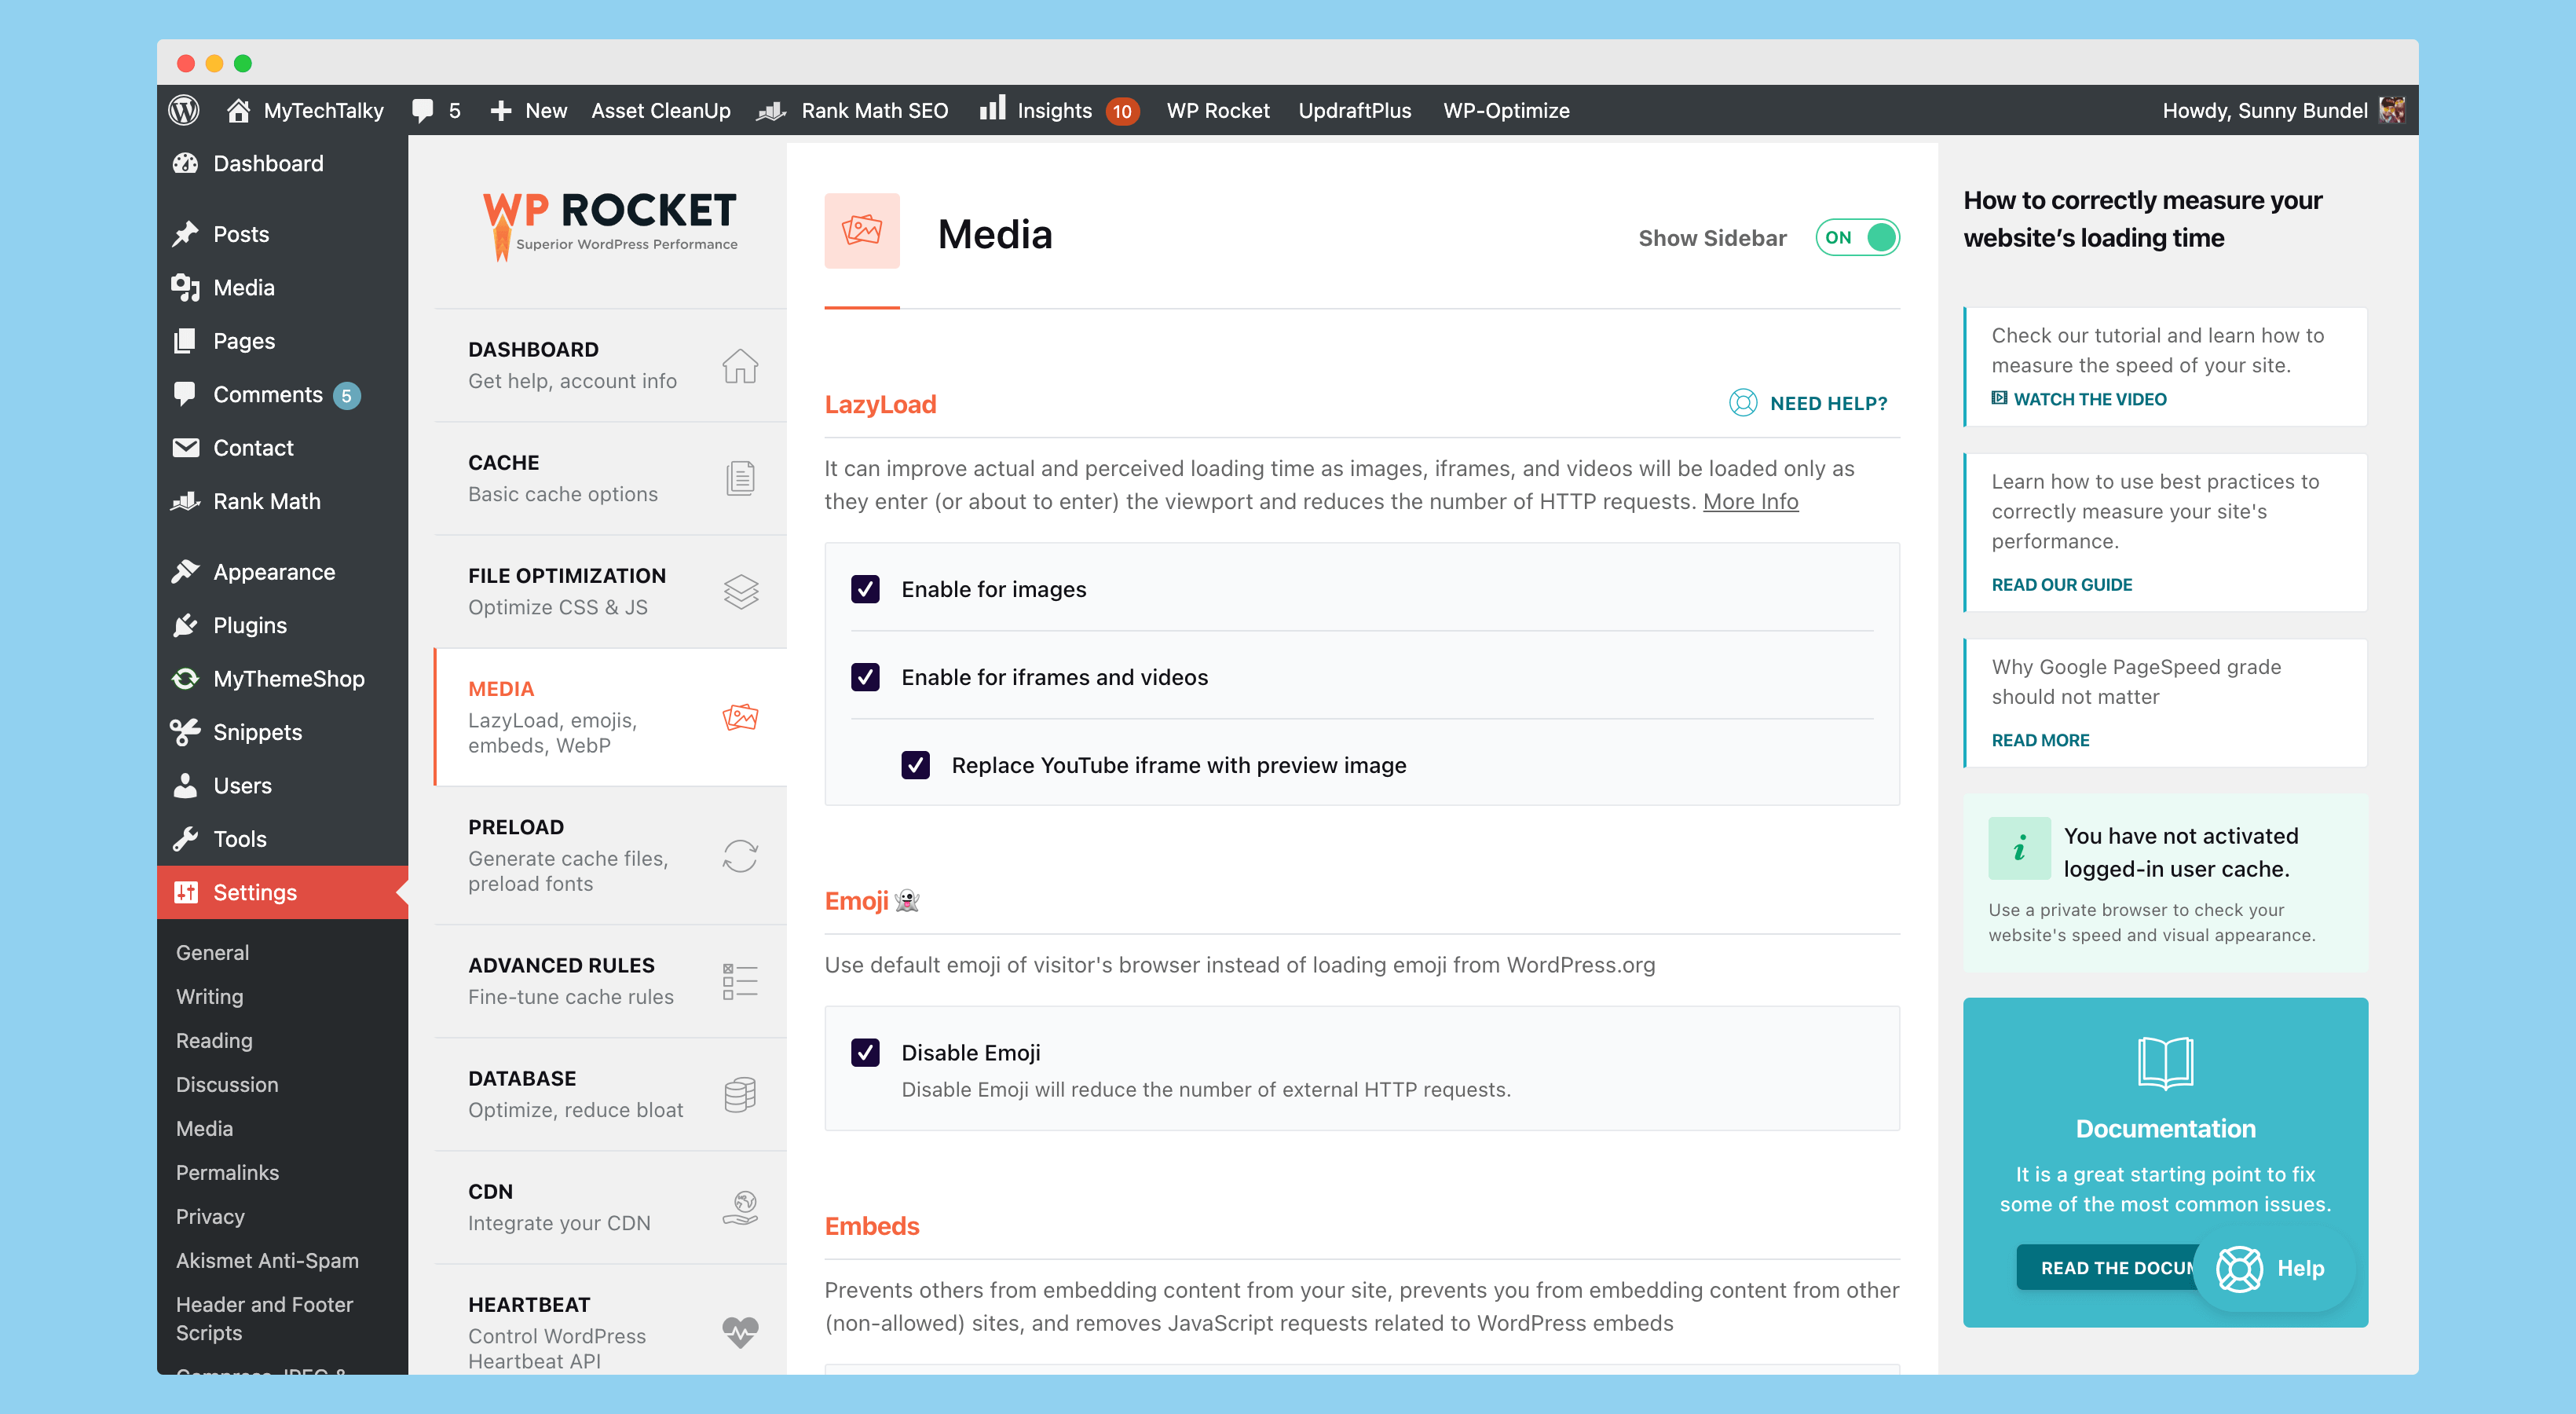
It really works like a charm to significantly reduce the loading time of the website and reduce the page size. Additionally, you’ll find an option to disable emojis and embed option, which further increases the speed of the website.
Database Optimization
WP Rocket has taken a further step and also introduced database optimization in their WordPress plugin. This feature facilitates you to optimize your database and remove unnecessary things from it.
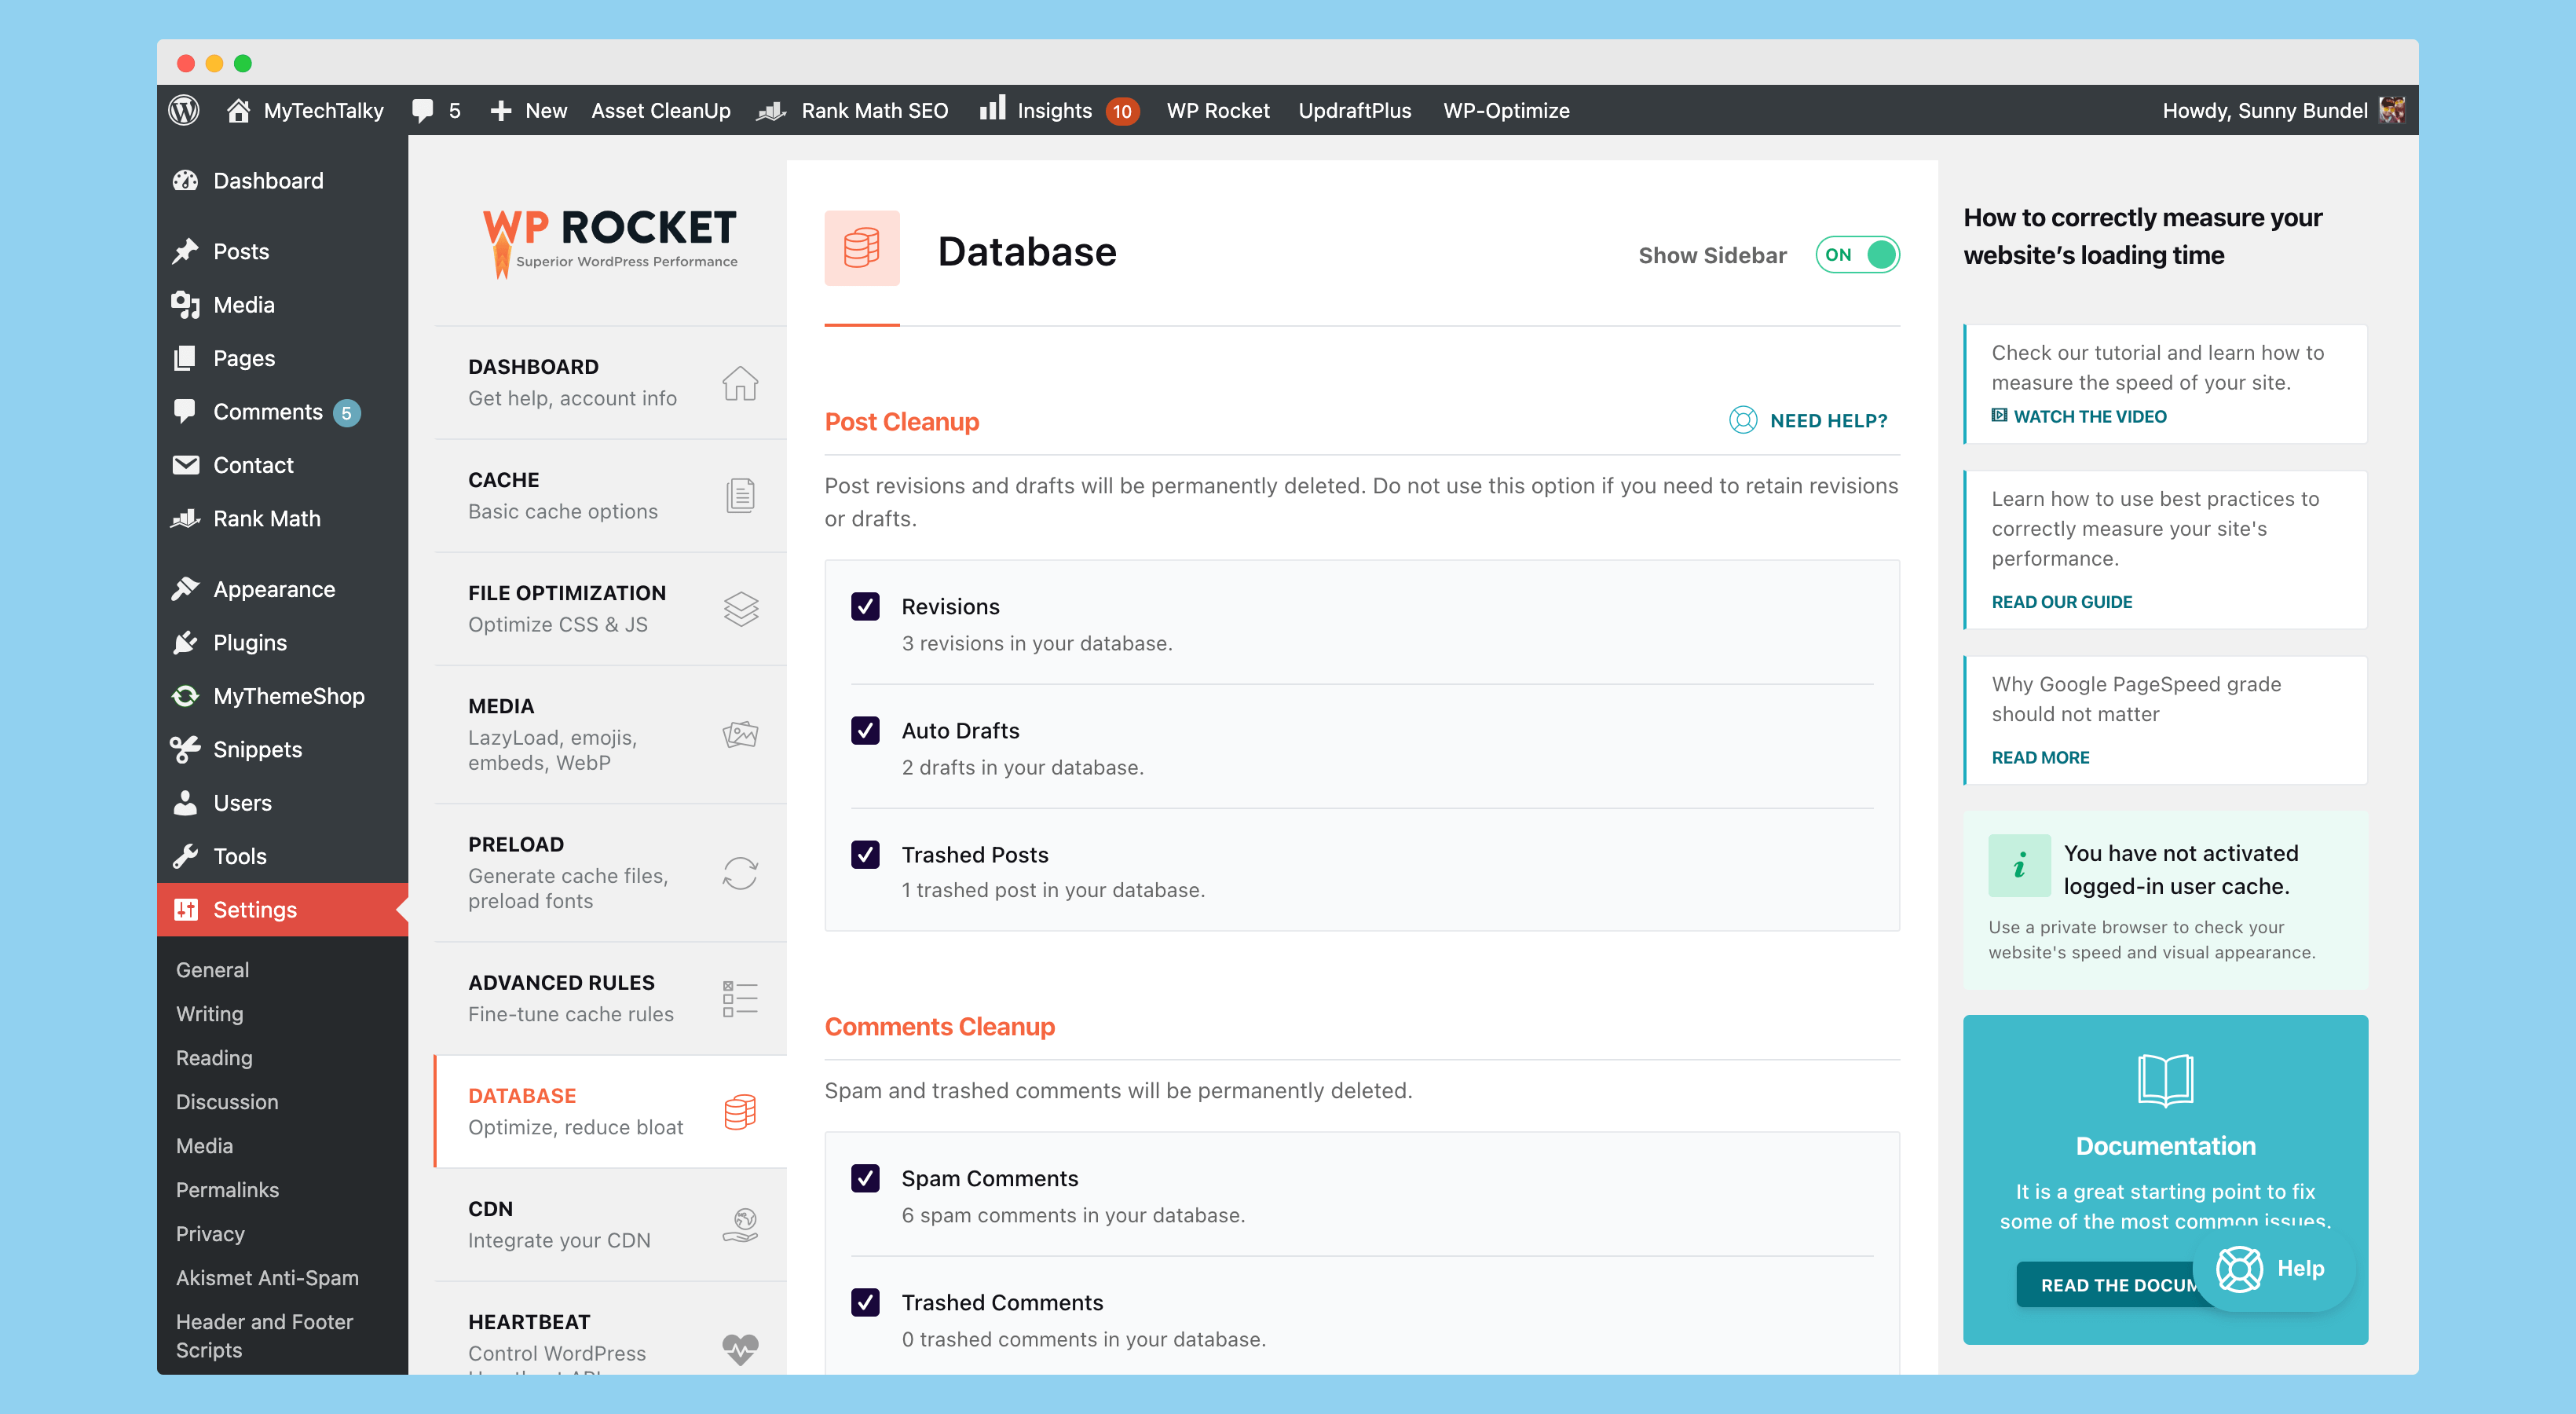
It further helps to optimize the overall functionality and increases the website speed by deleting the post revisions, trash, pending or spam comments, etc from your website.
Frequently Asked Questions
Still have a few doubts? Here I’m sharing a few FAQs which make you crystal clear.
Does WP Rocket Work with WordPress.com?
No, WP Rocket only works with self-hosted WordPress blogs.
Does WP Rocket Provide any Trials?
No, As of now WP Rocket doesn’t offer any trial of their plugin – but if you really want to try their plugin, then you can use the 30-day refund policy and try it.
Wrapping Up!
WP Rocket is one of the best cache plugins out there, and I personally like to use it. It comes with tons of features that make your website a lot faster than any other plugins out there.
If you want your website to score more on Google PageSpeed Insight or in GTMetrix, I highly recommend using this plugin. And it not just increases the website score in these tools, but you’ll instantly see a drastic change in the speed of your website once you installed and step this plugin on your website.
For better optimizations, I recommend you enable lazyload, database optimization, CDN, and preloading of the content. The critical CSS also works like a charm in this plugin.
If you’ve any doubts about using this plugin or if you wanted to share your opinion, then you can reach us at hello@mytechtalky.com or share your thoughts in the comment section below.

